Wednesday 23 September 2015

TASK 4 : 3D TYPOGRAPHY (FINAL)

3D typography is the final task that were given by our lecturer. We can decide whether to make only an alphabet or a word for our finals. I have done a lot of research of 3D typography on Pinterest and Behance. For my final, I make a 3D word "Chocolate".


These all are the reference of 3D typography.

In making this 3D typography, I traced the word in Adobe Illustration to get the shape and add on color into the word. After I satisfied with it, I continue the work into Adobe Photoshop to make it looks 3D.

I start color the words with dark chocolate color then keeps repeating until lightest brown to get the 3D looks. Then, I paint the melting chocolate at some parts on the "Chocolate" to make it like chocolaty-tasty. 

As for the background, I choose pink color because pink gives sweet feeling and it helps the "Chocolate" to stand out. I also add a little shadow below the word.


TASK 3 : MATTE PAINTING

Our 3rd task is to create a matte painting. Matte painting is a painted representation of a landscape, or set that able filmmakers to create illusion like magic that actually none exist. Matte painting is different than photo manipulation; it requires 60% of editing and 40% for painting. For this task, my idea is to do a damaged building with broken wall and floor, some green mildew, dark and gloomy environment.

1. I do some research on images that I want to apply onto my work from
Internet. Then, I downloaded the images to edited and composted it.

2. I start my matte painting by making the second image as the
background.Then, I make a new layer to apply new image.

3. I edit the new image that I apply; erase which parts
that I don't want and darken some parts with paint.

4. Apply the piano, then painted it a bit with brush to make
the piano blend with the background. I put dark color.

5. Paint some details (wires, shadow, highlight, mosses),
makes more messy, dark and gloomy surroundings.


TASK 2 : PORTRAIT

For 2nd task, lecturer told us to pick a photo of celebrity from Internet and then paint the portrait by using the same technique as we did for task one; the value. Many details need to be apply in making the portrait such as its shadow, highlight, hairs, and even the wrinkles. The celebrity that I choose is Van Diesel.
1. I placed the portrait of Van Diesel.

2. Then, I used the Pencil Tool to draw the outline of the portrait.

3. After the outline has been drawn, I choose blue and yellow color to paint.
I choose blue and yellow color because I think both colors blends
well together; complementary color.

4. I do a new layer for each part. I paint the face with the
darkest blue at first then colored until the lightest blue.

5. Doing some details onto the face; eyebrows, eyes, ears, nose, mouth.
After I'm done with the face, I paint the shirt afterward.

6. I used yellow color for the shirt. I do some touch up on the face (wrinkles
 to make the portrait looks not too flat or empty or flawless. That's all. 
My Van Diesel

Saturday 12 September 2015

TASK 1 : CREATING VALUES

Computer Illustration or Digital Illustration is the use of digital tools such as a tablet or a mouse to create images under the direct manipulation of the artist themselves. Abode Photoshop is used as the medium to produce images.

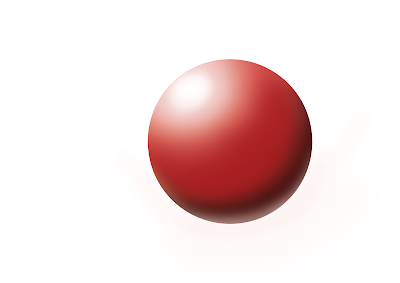
For this Computer Illustration subject, we used Photoshop to completed all our task. As for our first task, our lecturer teaches us how to create value in order to make a flat-shape object looks like 3-dimensional object.
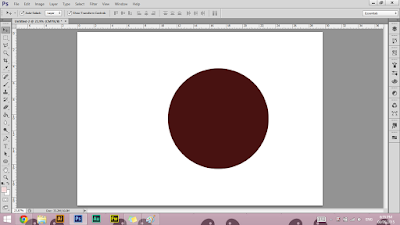
1. Makes any shapes that we want.
For examples, circle, cube, pyramid and so on. 

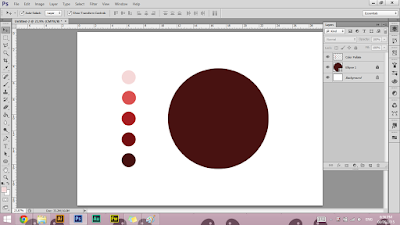
2. Pick a color values; must have the light and dark colors. 

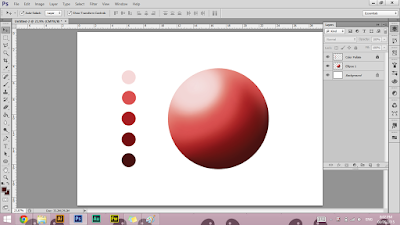
3. Use Magic Wand Tool to select the shape and then starts fill the shape with color.
Do start with dark to lightest color.

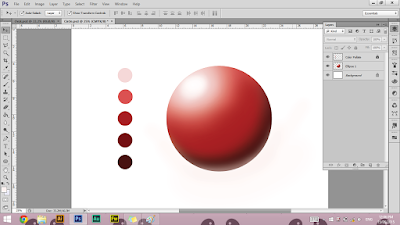
4. After finished with the color, do some highlight to make the shape looks 3D. 

And Ta-daaaa. Done !
After we're done with one shape, we required to make more shape by using this same method to get the 3D looks.